


Adresse
1 rue de Saint-Petersbourg75008 Paris
Mail
contact@bam.techTéléphone
+33 (0)1 53 24 00 83Have you ever found yourself working on a very underpowered device, where the slightest optimization could save your life?
In this article I'm going to share with you a little trick that got us out of this perilous situation, using a styling trick combined with the power of React memoization.
Here's a bit of background: this situation happened to us when we were working on televisions (with a web OS) with particularly poor performance. We were experiencing slowness when browsing through the available content.
In the application, the user can move around by changing the selected item with the remote control. In our case, when a video is selected, an overlay icon (e.g. a playback logo) is displayed on top of its thumbnail.
Often, users scroll quickly through the content by pressing and holding the remote control. As content scrolls quickly, it needs to be rendered efficiently.
Here, in a simplified manner, is what happens in our application when the user moves from one content to another:
.gif)
ℹ️ Find out more : this simplified case was made using the react-tv-space-navigation example application. To learn more about about cross-platform TV navigation in a React Native application, check out this article about Remote controls for React TV apps.
Briefly, the trick is to hide the video overlay via css rather than dismantling and reassembling the React component each time the video changes.
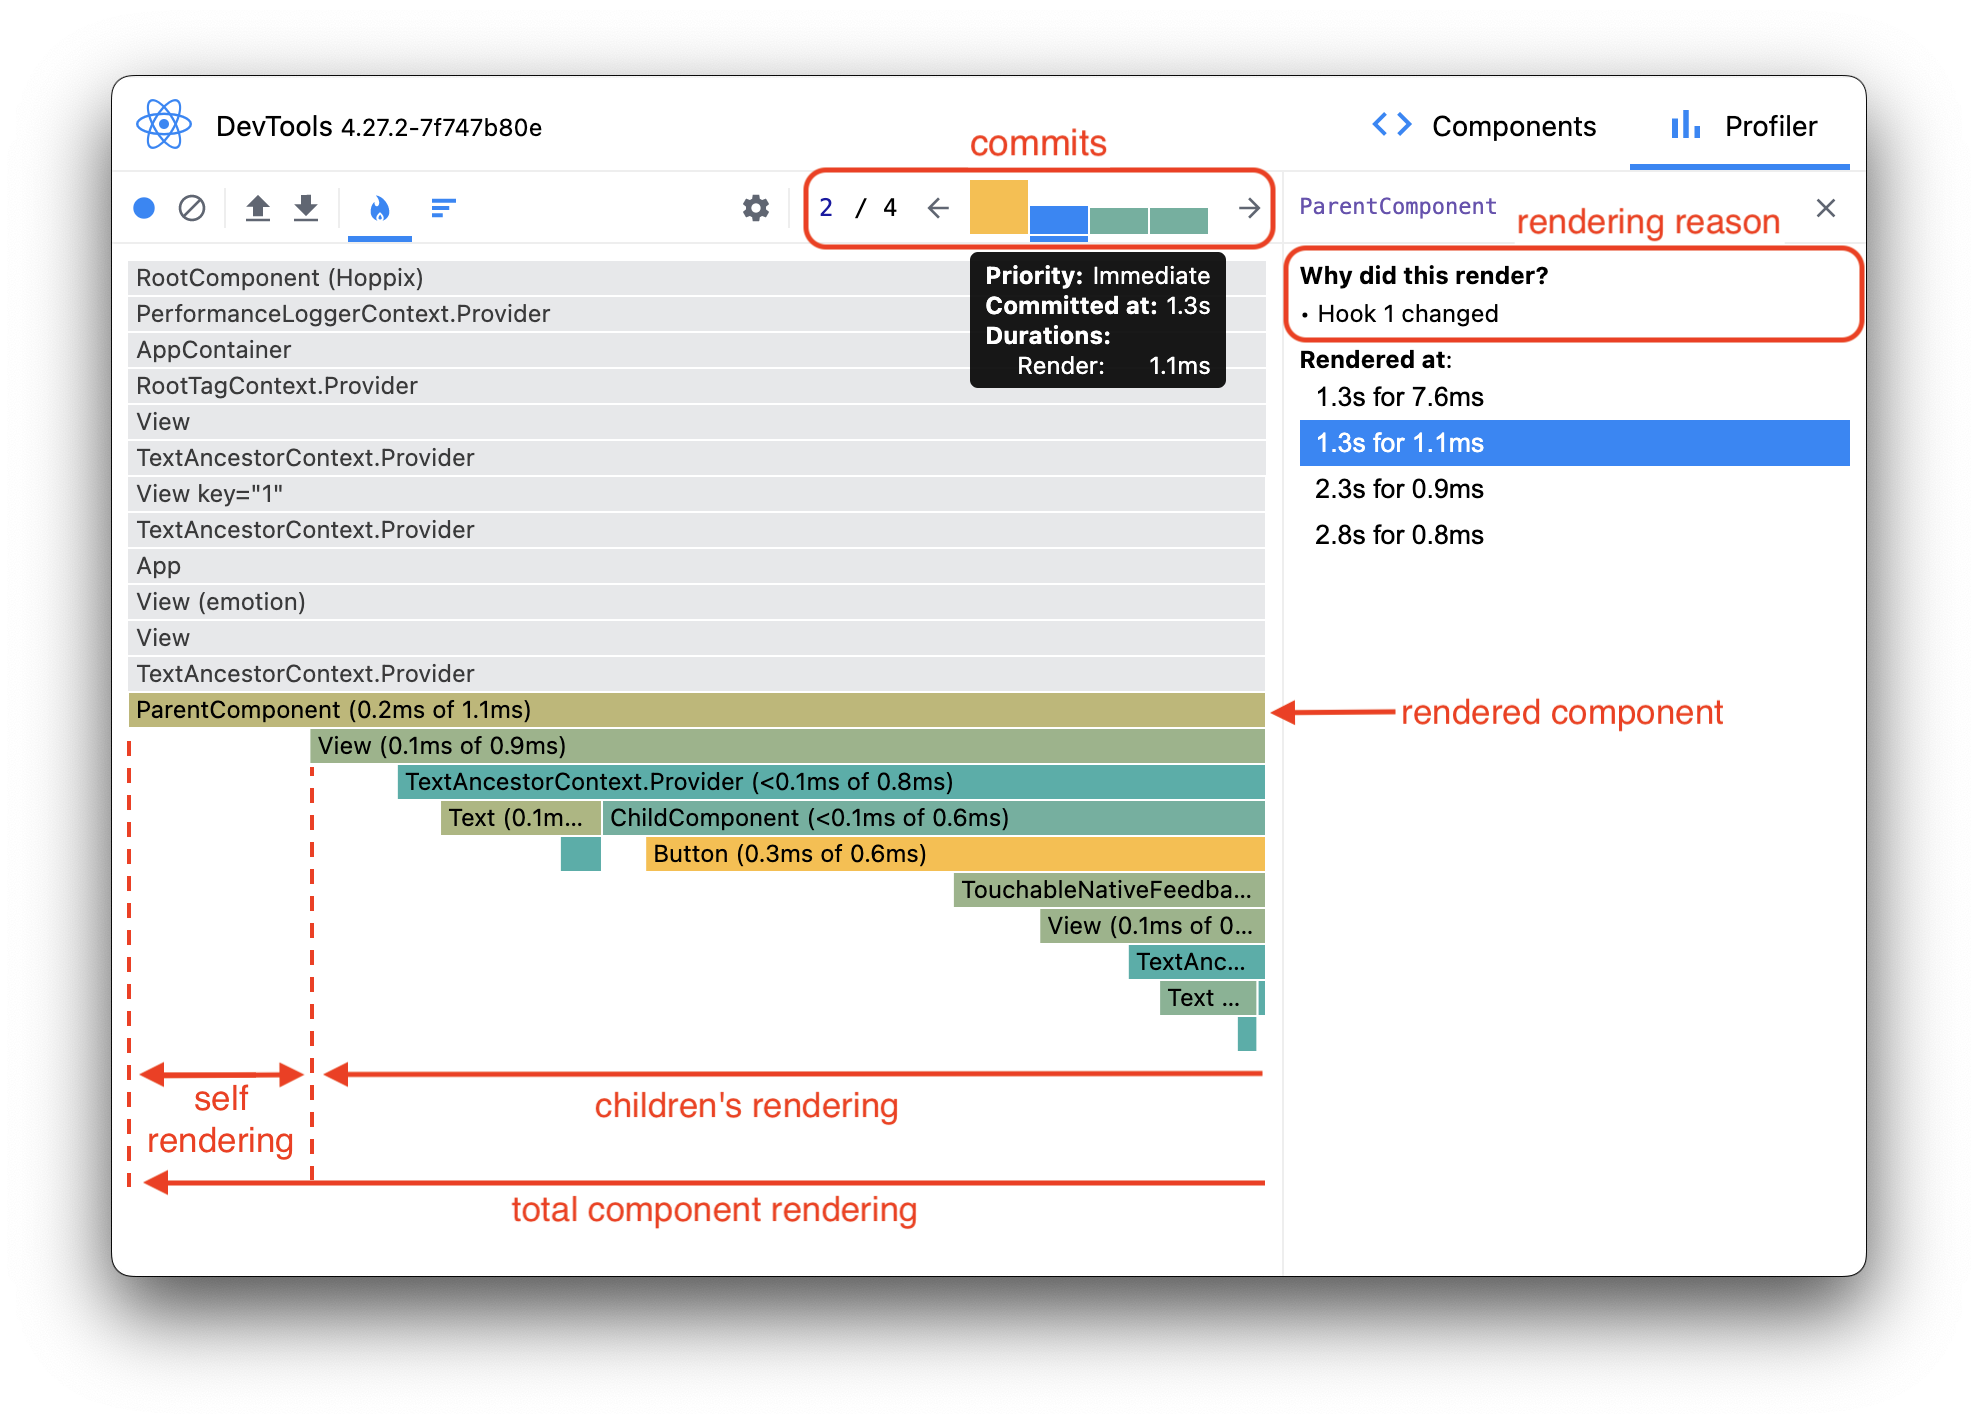
To check the performance impact of the code implemented in this article, we will use React DevTools. They provide a suite of tools for inspecting and debugging React. In our case, the Profiler will enable us to understand React's behavior. For example, the flame graphs will enable us to visualize the call stack of our components, understand why they render, and measure their impact over time.
On a flame graph, components are represented by bars. These bars are organized like a call stack, and therefore in hereditary order. React breaks down all the necessary changes made to the component tree into commits. In these commits, the components shown in color are those that have been called. For each component that has been rendered, you can then see its rendering time and why it was rendered.
There’s a meaning to the colors, too. A green bar means it renders quickly, while a yellow bar means it renders slowly. We can then also evaluate the impact of rendering children for a parent component, as the horizontal scale is proportional to the component's rendering time.
This will be clearer with a detailed screenshot. Take a look at it:
That should be enough information for the rest of this article. To learn more about performance in React, especially with DevTools, here's a talk that will turn you into an expert in no time. Let's look at a concrete example of application to understand how the trick works.
In a standard case, we conditionally display the overlay component of our thumbnail when the user select the video.
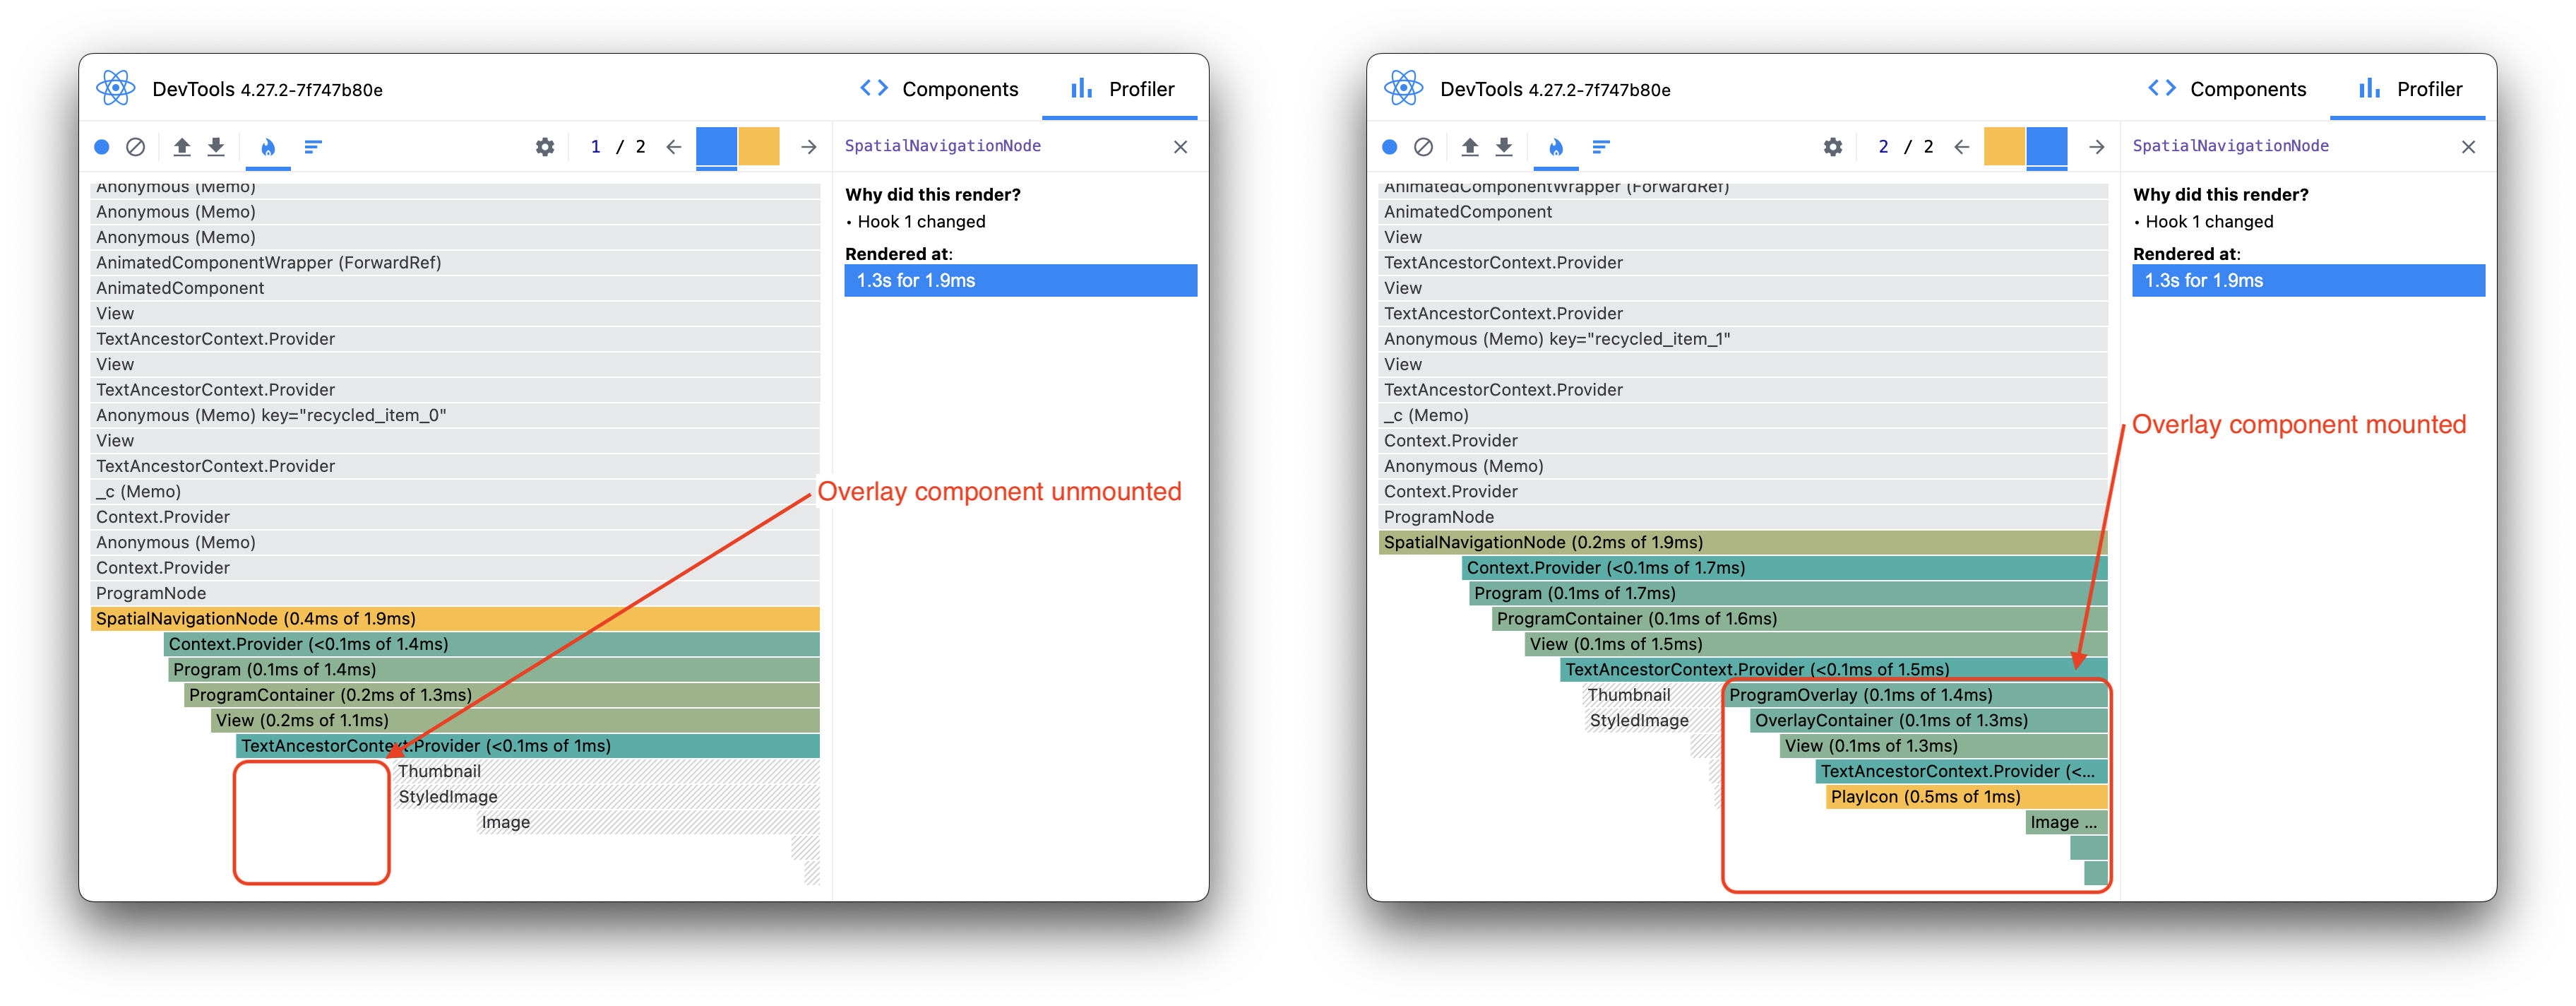
And here's the flame graph of the React rendering of the video thumbnail losing focus (1st screenshot) and the second one regaining focus (2nd screenshot).
In this case, we can see that the Overlay component is unmounted in the first rendering commit and then mounted in the second.
A first iteration for a more efficient solution would be to avoid unmounting and mounting the overlay component each time the focus changes. In fact, unmounting/mounting a component takes longer than re-rendering it.
To do this, we can simply hide the component without unmounting it. By adding a parent to our Overlay that uses the css ++code>opacity++/code> property, we can then easily hide the elements above our thumbnail.
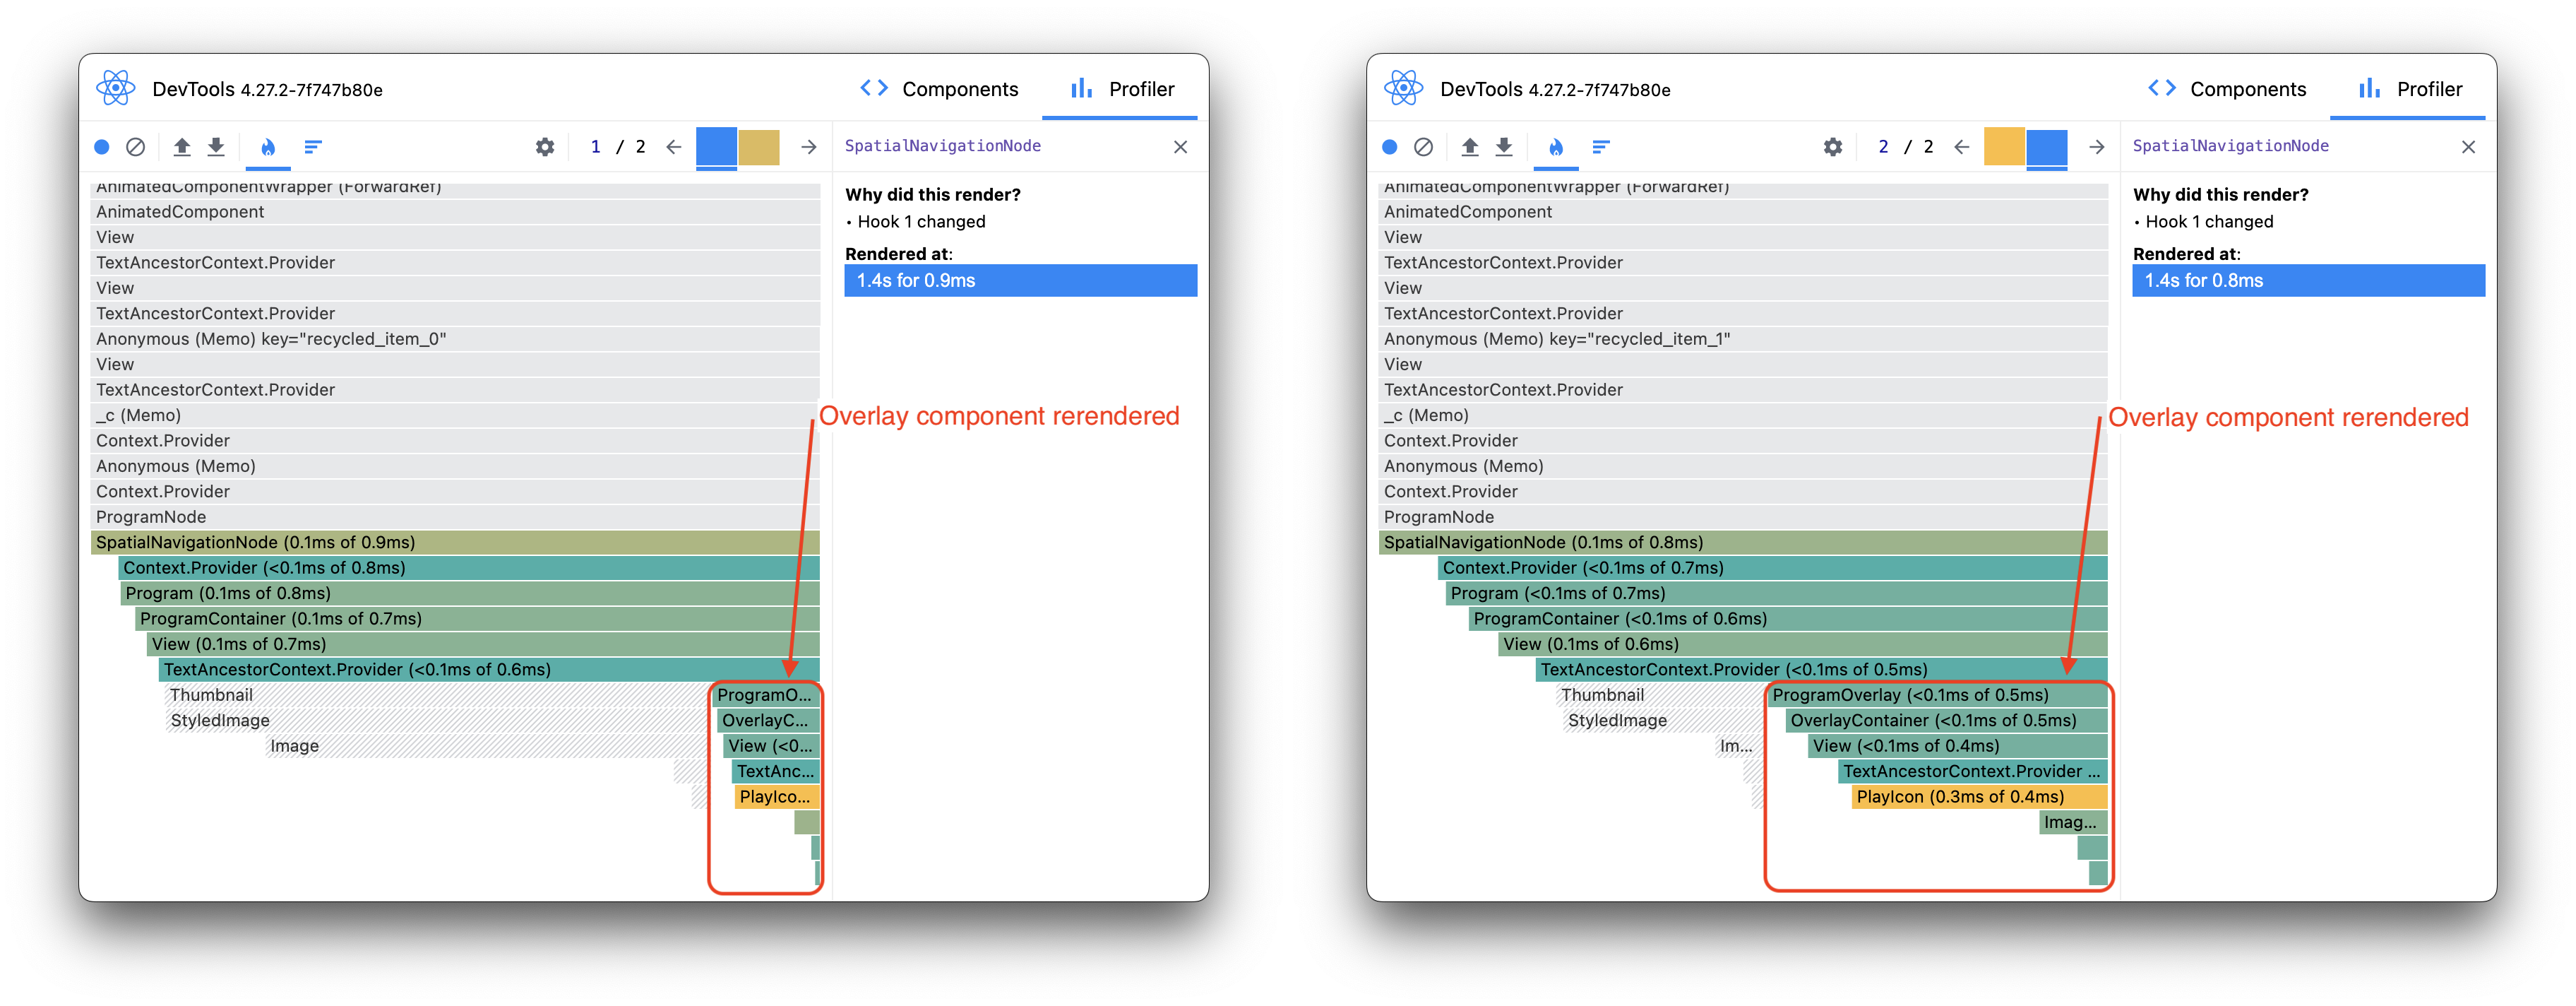
This solution allows us to simply re-render the Overlay component of our video thumbnails when the focus changes.
However, when we re-render the overlay's parent (by changing the ++code>isFocused++/code> props), we also re-render all its children. To improve this, we can use a React feature called memoization.
For this, nothing simpler, React.memo is used for the child component, which theoretically doesn't need to be re-rendered in this case.
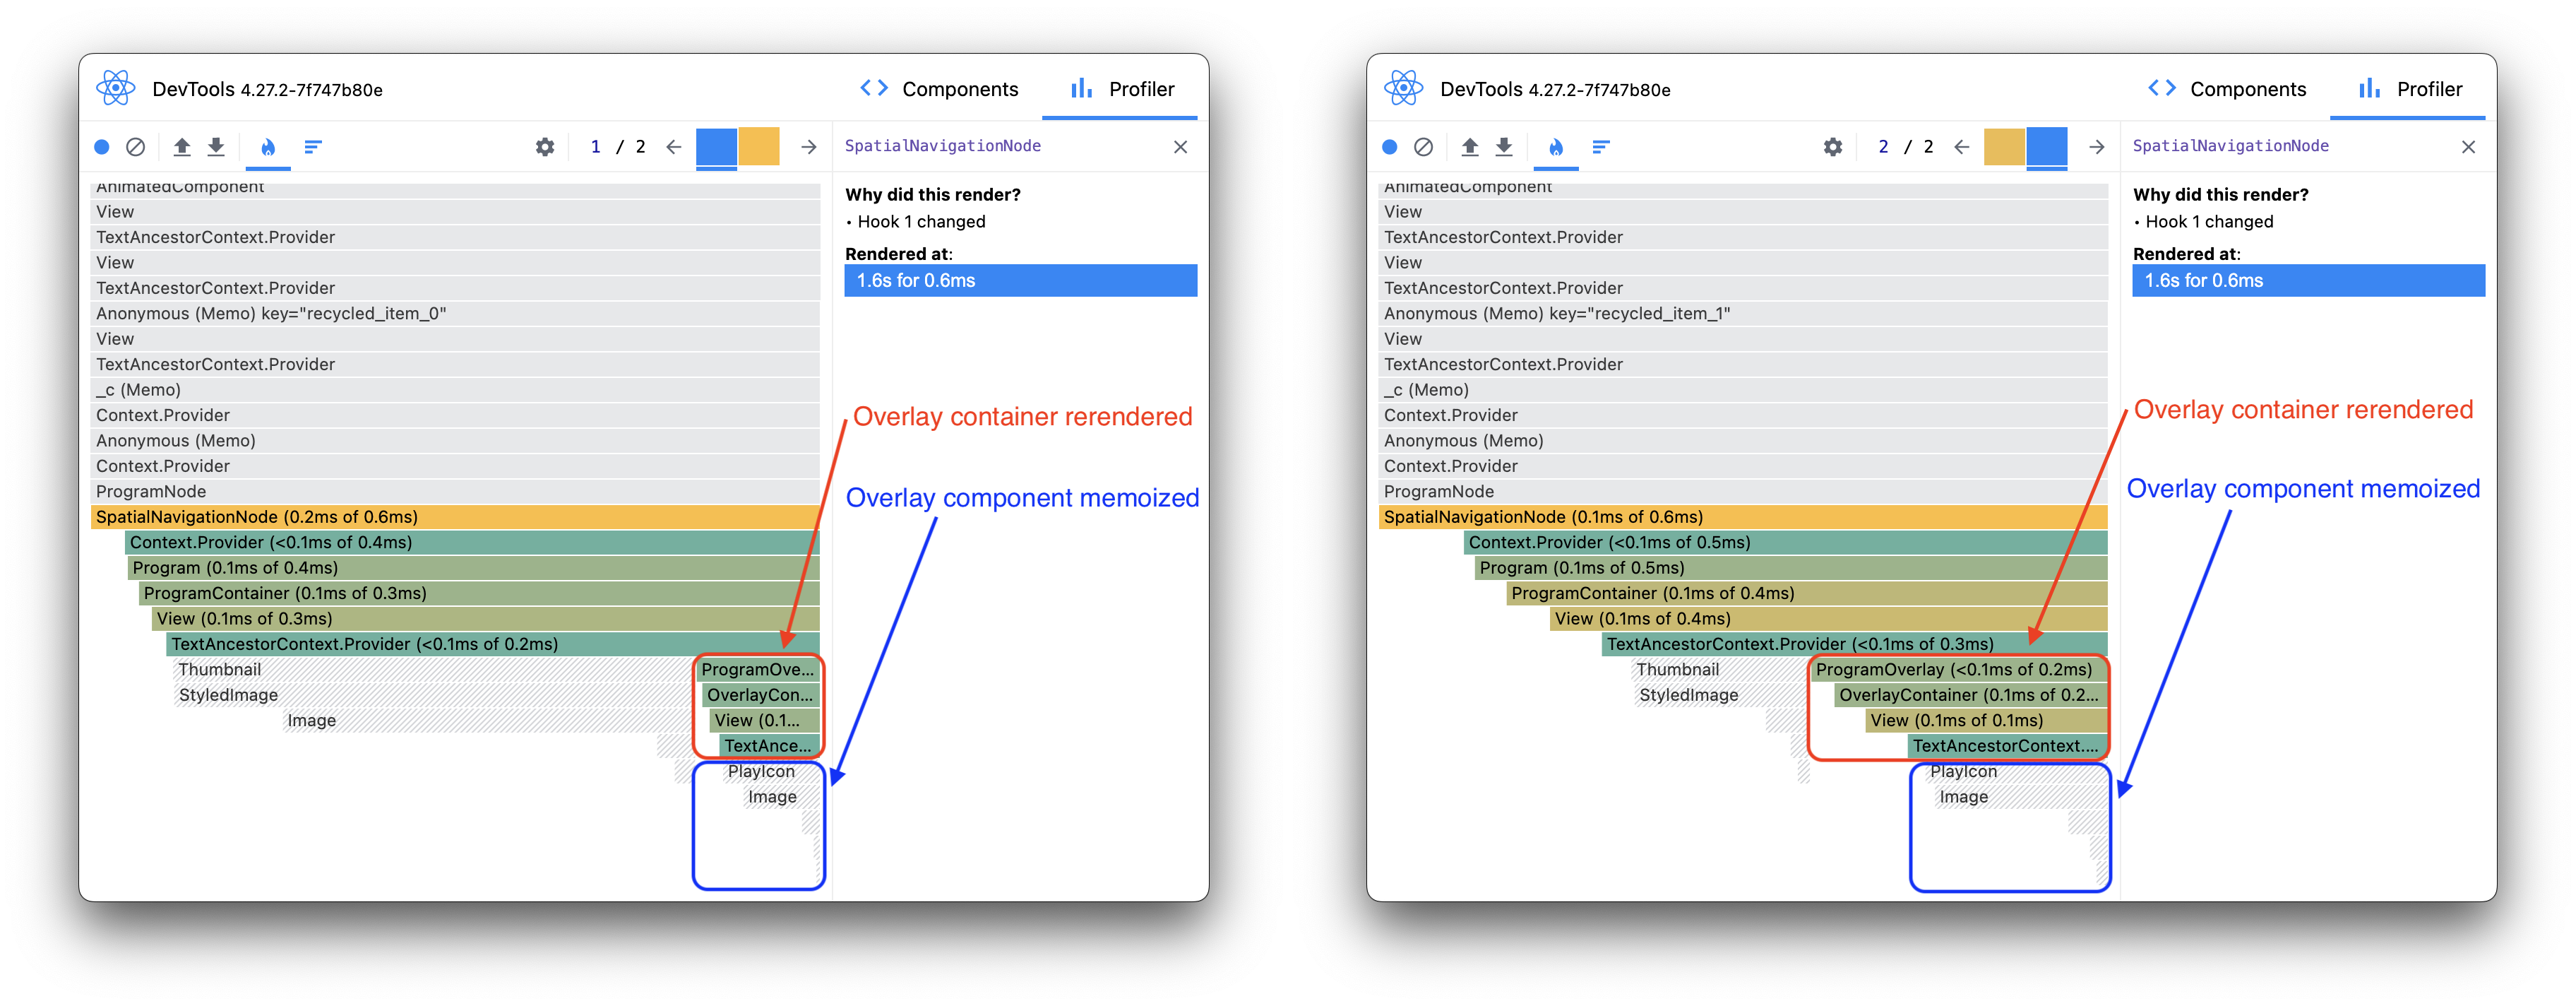
As a result, the overlay component is memoized and does not render.With this solution, each time the focus changes, React simply re-renders the thumbnail's parent component.
ℹ️ Useful tip : to avoid having ++code>Anonymous++/code> components in your flame graph after you've memoized them, you can use the
++code>[displayName]++/code> property to keep showing their name.
As is often the case when looking for optimization solutions, there are limits and trade-offs. In our case :
As you can see, this is a small performance optimization that comes with its counterparts. As the identified limitations were not a problem in our case, this optimization helped us achieve a smooth scroll.
It's probably an unusual use case, but this tip highlights some interesting React principles.
I hope it serves as inspiration for your own solutions.


Le BAM Innovation Lab, pour rester à la pointe des dernières innovations tech et produit !


