


Adresse
1 rue de Saint-Petersbourg75008 Paris
Mail
contact@bam.techTéléphone
+33 (0)1 53 24 00 83These are tests that test a user behavior in the application.
Developers can then test "critical paths" automatically and work with a safety net that ensures they don't break any features.
These tests automate product quality and save a lot of time because they can accurately reproduce human behavior: clicking on a button, expecting to see something, navigating to another page, being able to drag something?
Today, Flutter is a strong competitor in integration testing since he offers similar features as would do other tools (Detox, Waldo etc.) with the difference that it does not require the use of a third party tool so that all the tests of the application can be centralized !
In this article, I will show you how you can quickly set up your integration tests with Flutter 2.5.
In this article, I will use the brand new skeleton Flutter example app, but you can use the app you are currently working on.
Make sure to have Flutter 2.5.X installed and run:
++code>flutter create -t skeleton my_app++/code>
++code>++/code>
Open it in your favorite IDE (I'll use VSCode), and run it:
++code>code my_app && flutter run++/code>++code>
++/code>++code>++/code>
++code>In this example app we will test when the user tap on one item's list, we navigate to the item details page and we expect to find "more information here". Let's go !
Before writing the test, we need to add the flutter package integration_test in our pubspec.yaml:
++/code>
++code>dev_dependencies:++/code>
++code> integration_test:++/code>
++code> sdk: flutter++/code>
++code> ++/code>
++code>Then, create a folder named "integration_test" at the root of your project with a file "tap_on_item_list_navigation_test.dart":++/code>++code>++/code>
++code>import 'package:flutter_test/flutter_test.dart';++/code>
++code>import 'package:integration_test/integration_test.dart';++/code>
++code>++/code>
++code>void main() { IntegrationTestWidgetsFlutterBinding.ensureInitialized();++/code>
++code> testWidgets("Tap on item list should navigate to item details page", ++/code>++code> ++/code>
++code>(WidgetTester tester) async {++/code>
++code> expect(1 + 1, 2); ++/code>
++code>});}++/code>
Now++code>, we will check if Flutter has located our integration tests files by running:++/code>
++code>flutter test integration_test

++/code>++code>++/code>
++code> ++/code>
++code>++/code>++code>Great ! Now we can start coding our integration test.++/code>
++code>We are going to import our app, on top of the test file:++/code>
++code>import 'package:my_app/main.dart' as app;
++/code>
Then, we need to tell in our test that we want to start the app:
++code>/ *** /++/code>
++code>testWidgets("Tap on item list should navigate to item details page",++/code>
++code> (WidgetTester tester) async {++/code>
++code> ++/code>
++code> //HERE++/code>
++code> app.main();++/code>
++code>++code> ++/code>++/code>++code style="background-color: transparent;">await tester.pumpAndSettle();++/code>
++code style="background-color: transparent;"> ++/code>
++code> expect(1 + 1, 2);++/code>
++code> });++/code>
++code> ++/code>
++code> ++/code>
You'll notice that I told the widget tester to "pumpAndSettle" which means: "trigger the next frames until you have no more". It allows our test suite to make sure our app has finished starting, or an animation finished to play.
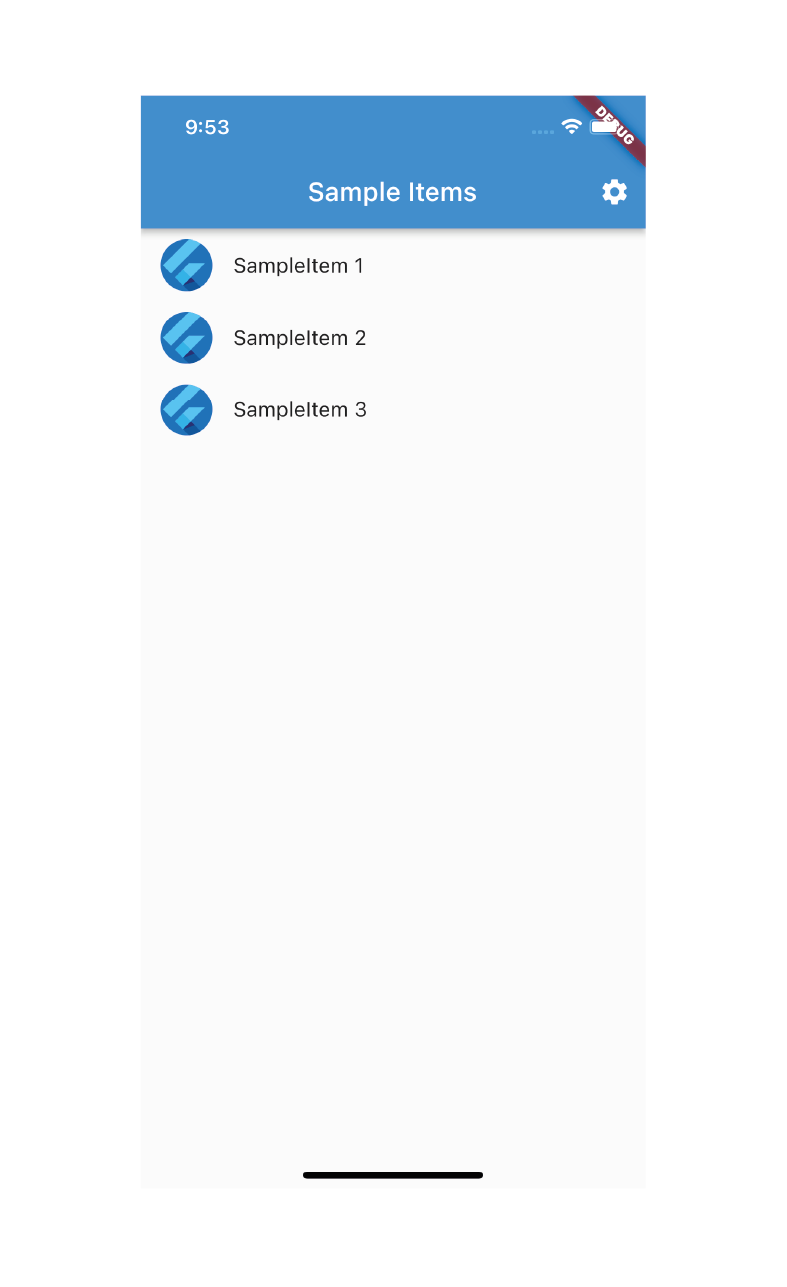
Now we are going to click on the second item of the list.
++code>/ *** /++/code>
++code>testWidgets("Tap on item list should navigate to item details page",++/code>
++code> (WidgetTester tester) async {++/code>
++code> app.main();++/code>
++code> ++/code>++code style="background-color: transparent;">await tester.pumpAndSettle();++/code>
++code style="background-color: transparent;"> ++/code>
++code style="background-color: transparent;"> //HERE++/code>
++code style="background-color: transparent;"> ++/code>
++code style="background-color: transparent;">await tester.tap(find.text('SampleItem 2')); ++/code>
++code style="background-color: transparent;">await tester.pumpAndSettle(); ++/code>
++code style="background-color: transparent;">++/code>
++code> expect(1 + 1, 2);++/code>
++code> });++/code>
++code> ++/code>
++code> ++/code>
Then we can expect to find "More information here" !
++code>testWidgets("Tap on item list should navigate to item details page",++/code>
++code> (WidgetTester tester) async {++/code>
++code> ++/code>
++code> app.main();++/code>
++code> await tester.pumpAndSettle();++/code>
++code> await tester.tap(find.text('SampleItem 2'));++/code>
++code> await tester.pumpAndSettle();++/code>
//HERE
++code> expect(find.text('More Information Here'), findsOneWidget);++/code>
++code> });++/code>
++code> ++/code>
Now let's run it again ? All tests passed!
As you saw, integration tests with Flutter is a wonderful way to test the features of your application.
They are easy to set up and allows you to interact with your app in many ways.
You can also connect those tests suites to the Firebase Test Lab to run them on real devices in order to reproduce a production environment !
I hope you enjoyed this article,
Happy Coding !
++code>++/code>


Le BAM Innovation Lab, pour rester à la pointe des dernières innovations tech et produit !


