


Adresse
1 rue de Saint-Petersbourg75008 Paris
Mail
contact@bam.techTéléphone
+33 (0)1 53 24 00 83The SmartWatch market has grown a lot in the past few years. If you are currently developing a smartphone application you may be tempted to add an extension to this app running on a smartwatch.
In this tutorial, you will not learn how to build an apple watch app using react-native. Nevertheless, you will learn how to add a native Apple Watch extension to your existing react-native application.
You will need :
You will not need :
Start a new react-native project using the react-native CLI.
++pre>++code class="has-line-data" data-line-start="23" data-line-end="25">react-native init RNWithAppleWatch
++/code>++/pre>
Then check if the initialization went well by running the app on an iOS device.
++pre>++code class="has-line-data" data-line-start="29" data-line-end="31">cd RNWithAppleWatch && react-native run-ios
++/code>++/pre>
You should see this screen :

Then, open the project with your favorite text editor. We are going to modify our ++code>app.js++/code> file to look like this :
++pre>++code class="has-line-data" data-line-start="39" data-line-end="69">import React, {useState} from 'react';
import {SafeAreaView, StyleSheet, TextInput, Button, Alert} from 'react-native';
const App = () => {
const [message, setMessage] = useState('');
const sendMessageToAppleWatch = () => {
Alert.alert(`the message "${message}" has been sent`);
};
return (
<SafeAreaView style={styles.container}>
<TextInput
value={message}
onChangeText={setMessage}
placeholder="message"
/>
<Button onPress={sendMessageToAppleWatch} title="SEND" />
</SafeAreaView>
);
};
const styles = StyleSheet.create({
container: {
flex: 1,
alignItems: 'center',
justifyContent: 'center',
},
});
export default App;
++/code>++/pre>
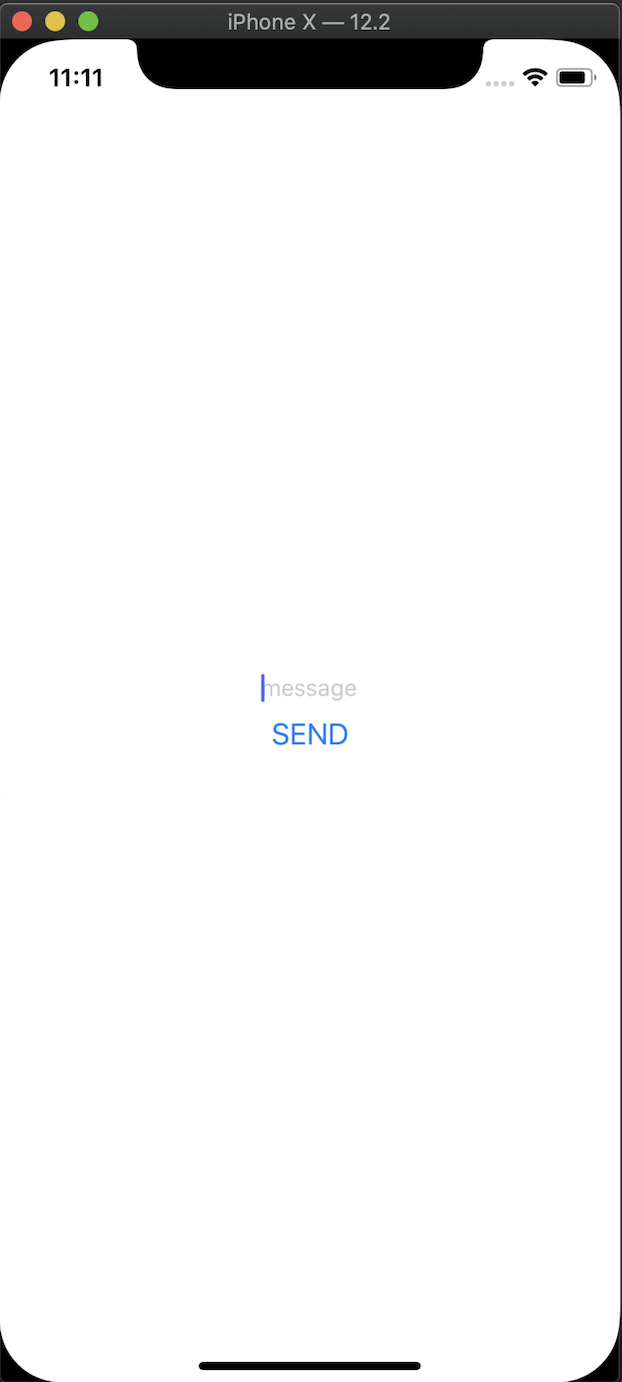
Now our app should look like this :
Now let the fun part begin.
Open the ++code>ios++/code> subdirectory of your react-native project using ++code>Xcode++/code>.
On the left side of the screen :
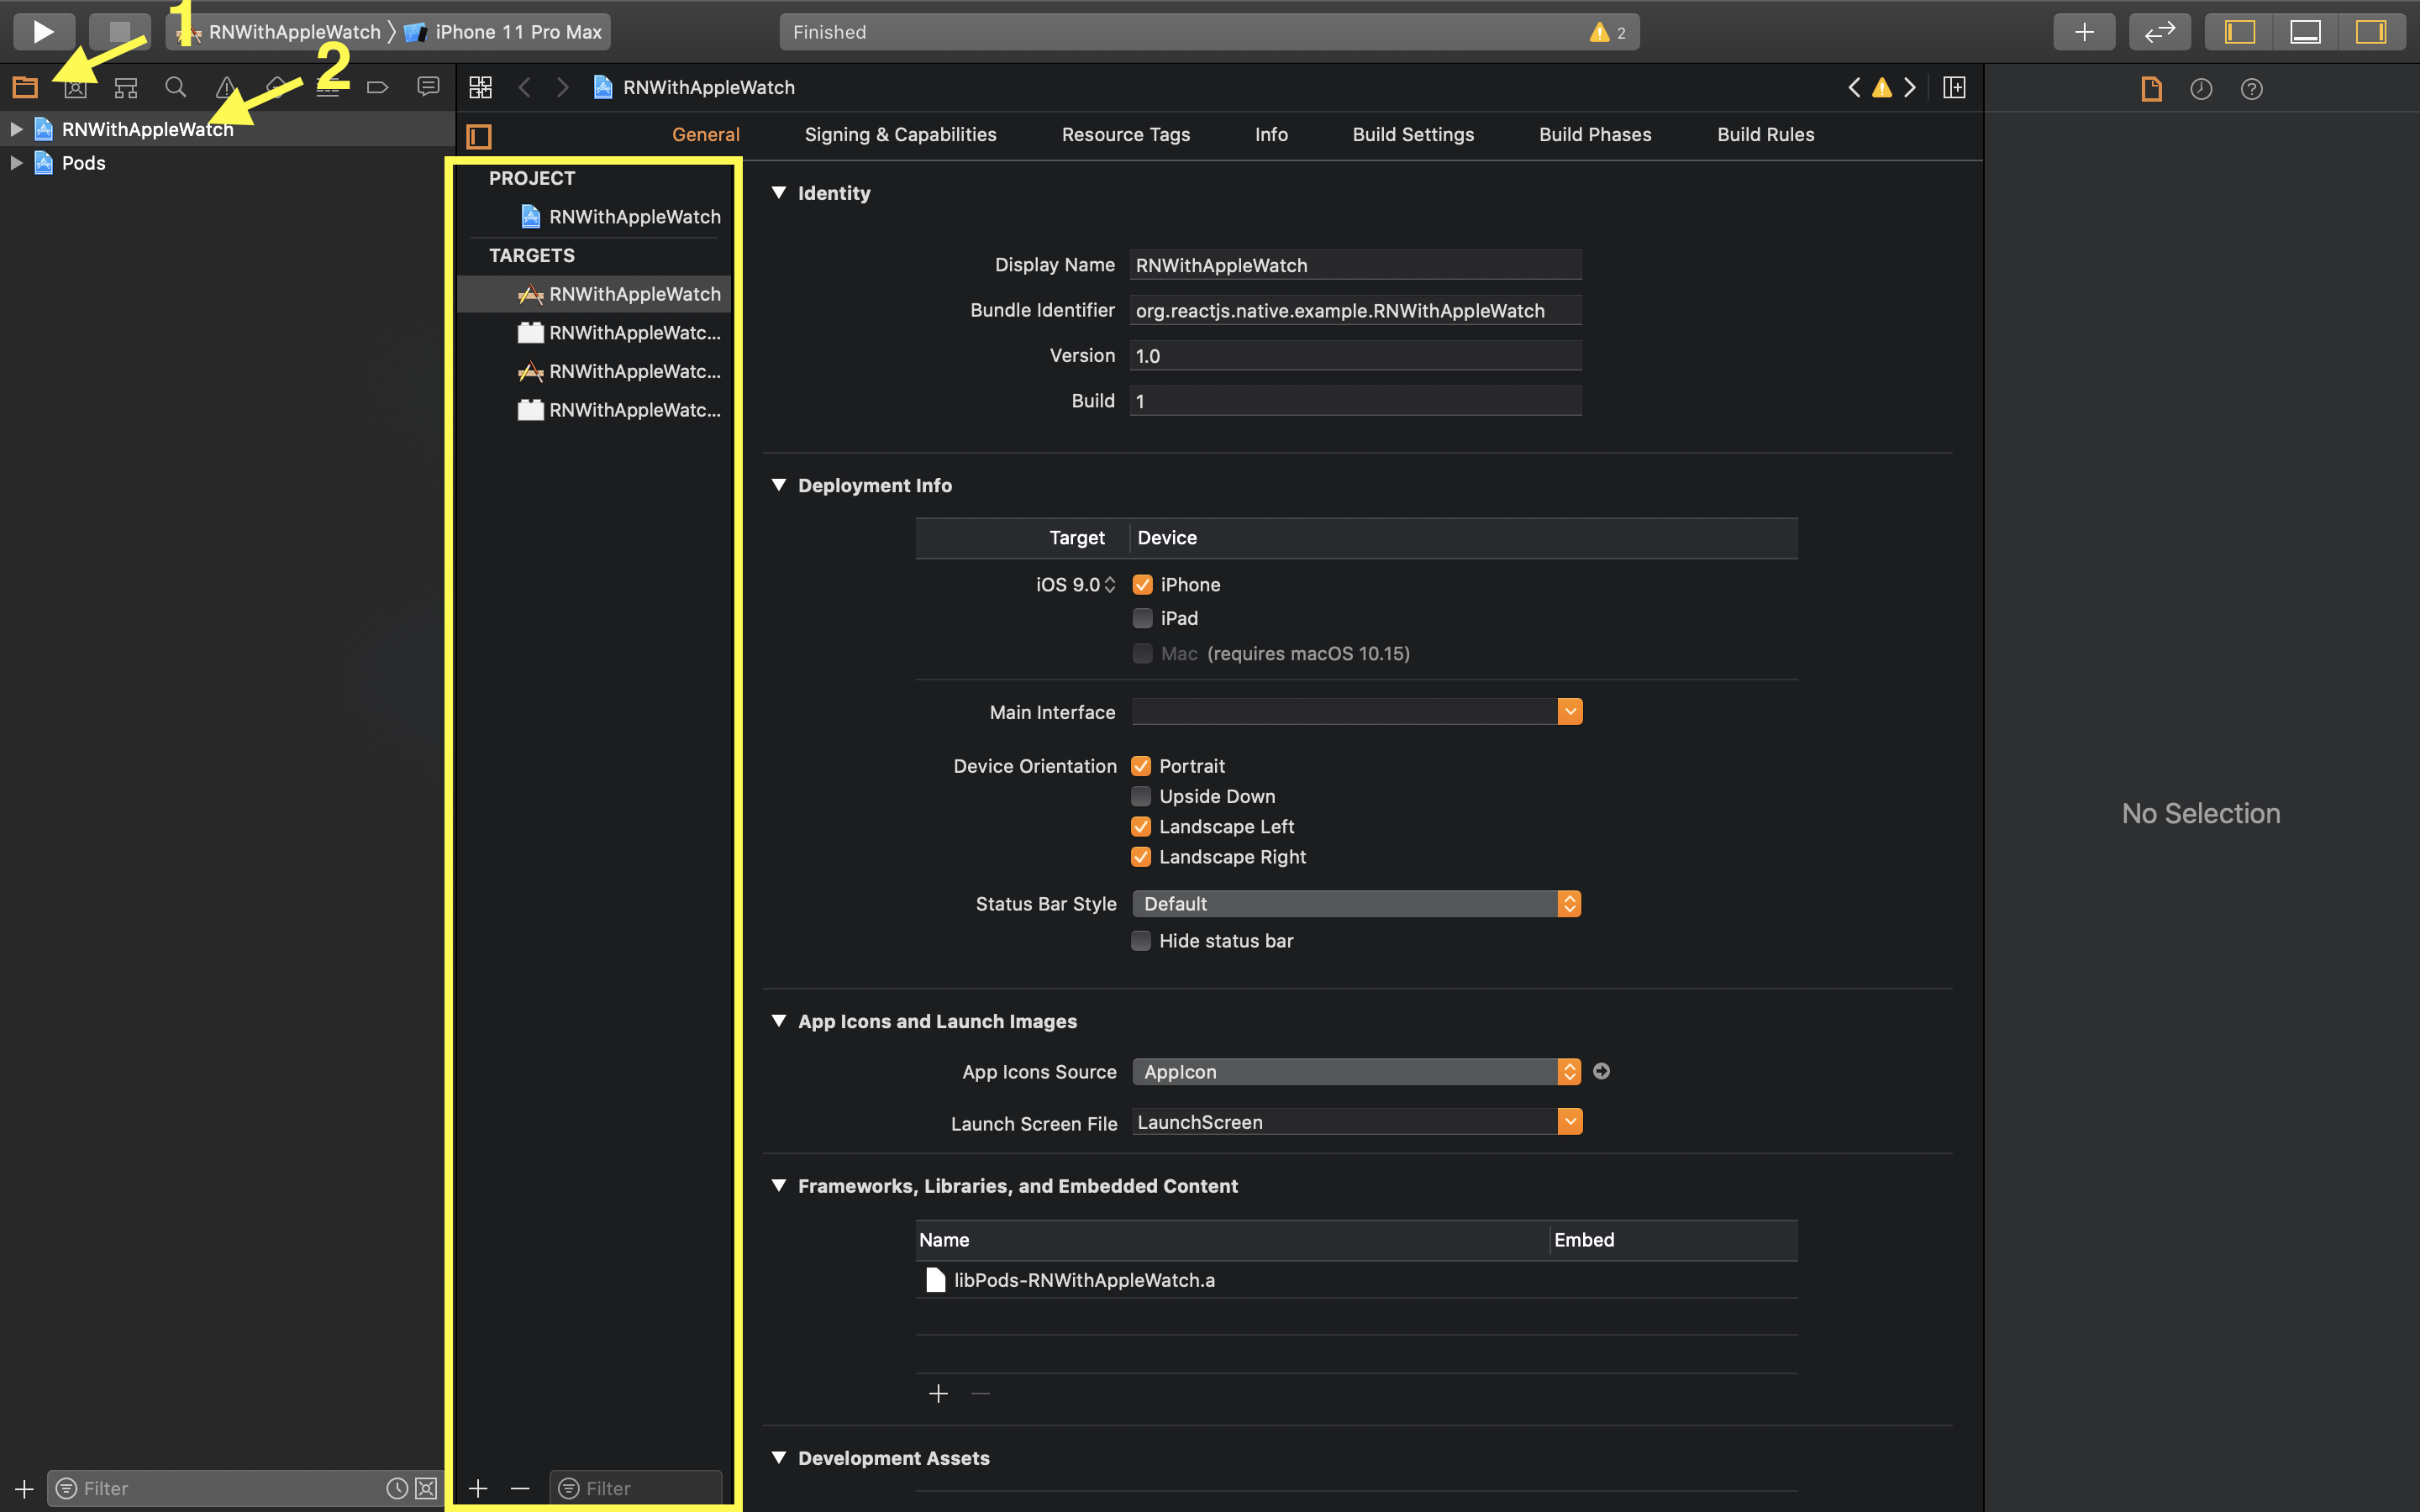
You will see the list of all the targets of your iOS application. A target defines a single product that can be built. By default, we have targets for iOS and tvOS. We are going to add a new target for WatchOS. Click on the + button at the bottom of the targets list.

We have multiple options here. We will focus on the ++code>Application++/code> list. ++code>Game App++/code> is not what we want in this tutorial. ++code>Watch App++/code> will create a standalone Watch application that doesn't need a related iOS app to run. ++code>Watch App for iOS App++/code> will create a watch application related to an iOS application. We will select this option in our case. On the next page, you have to :
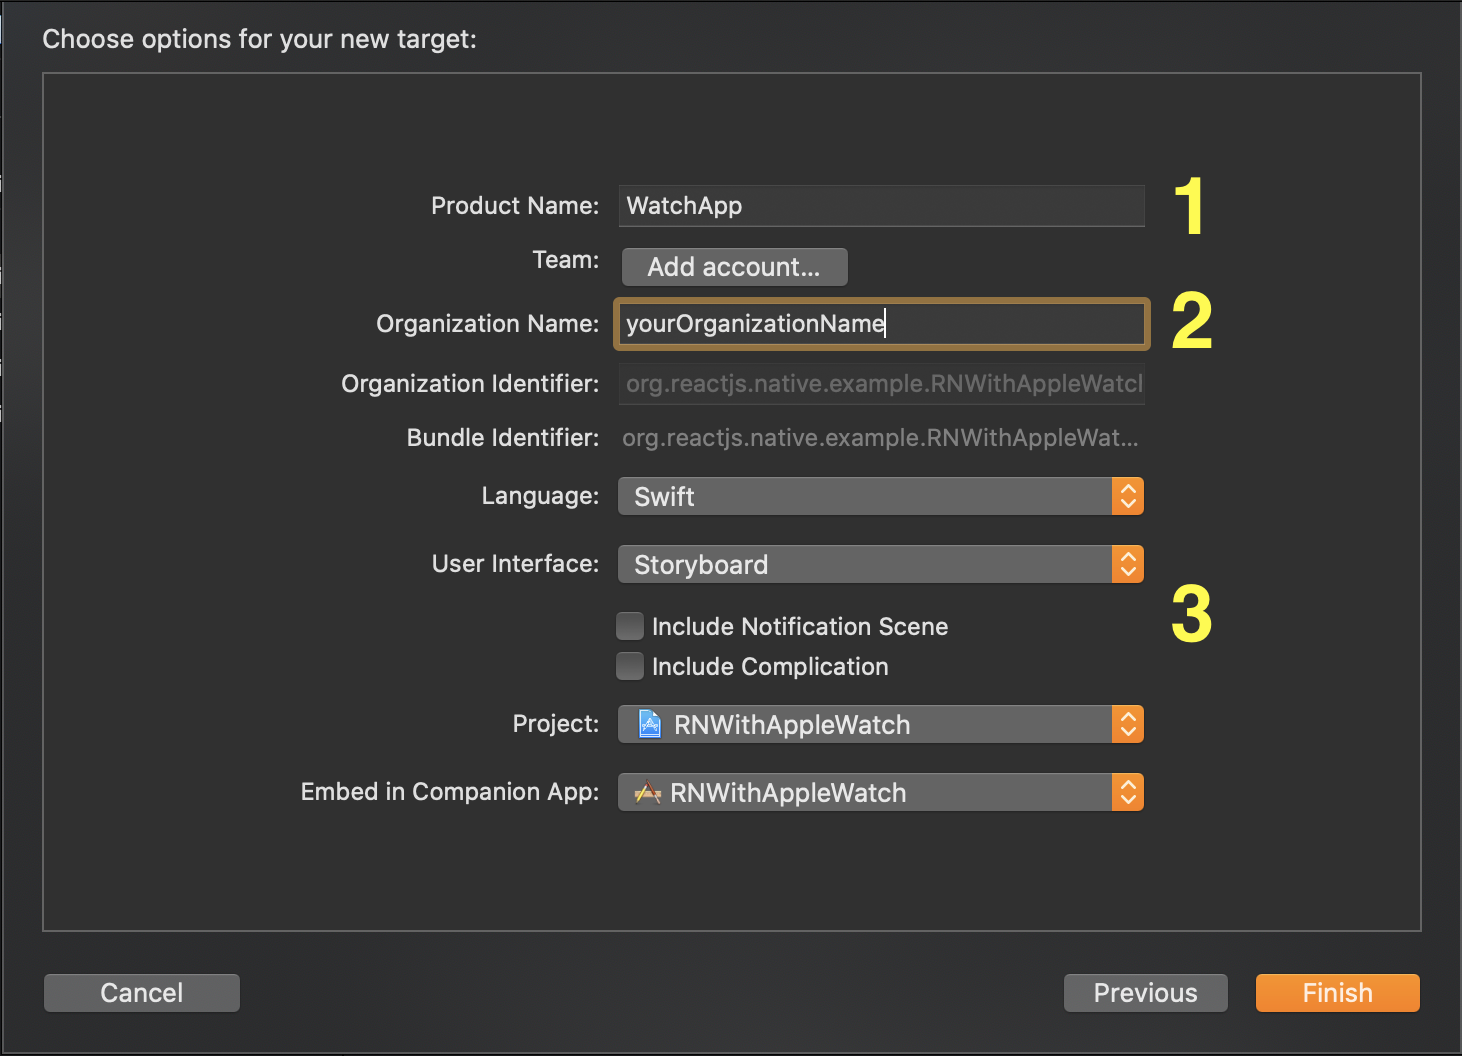
When you click on finish, a prompt will appear and ask you if you want to activate a scheme for your watch target, click on ++code>activate++/code>.
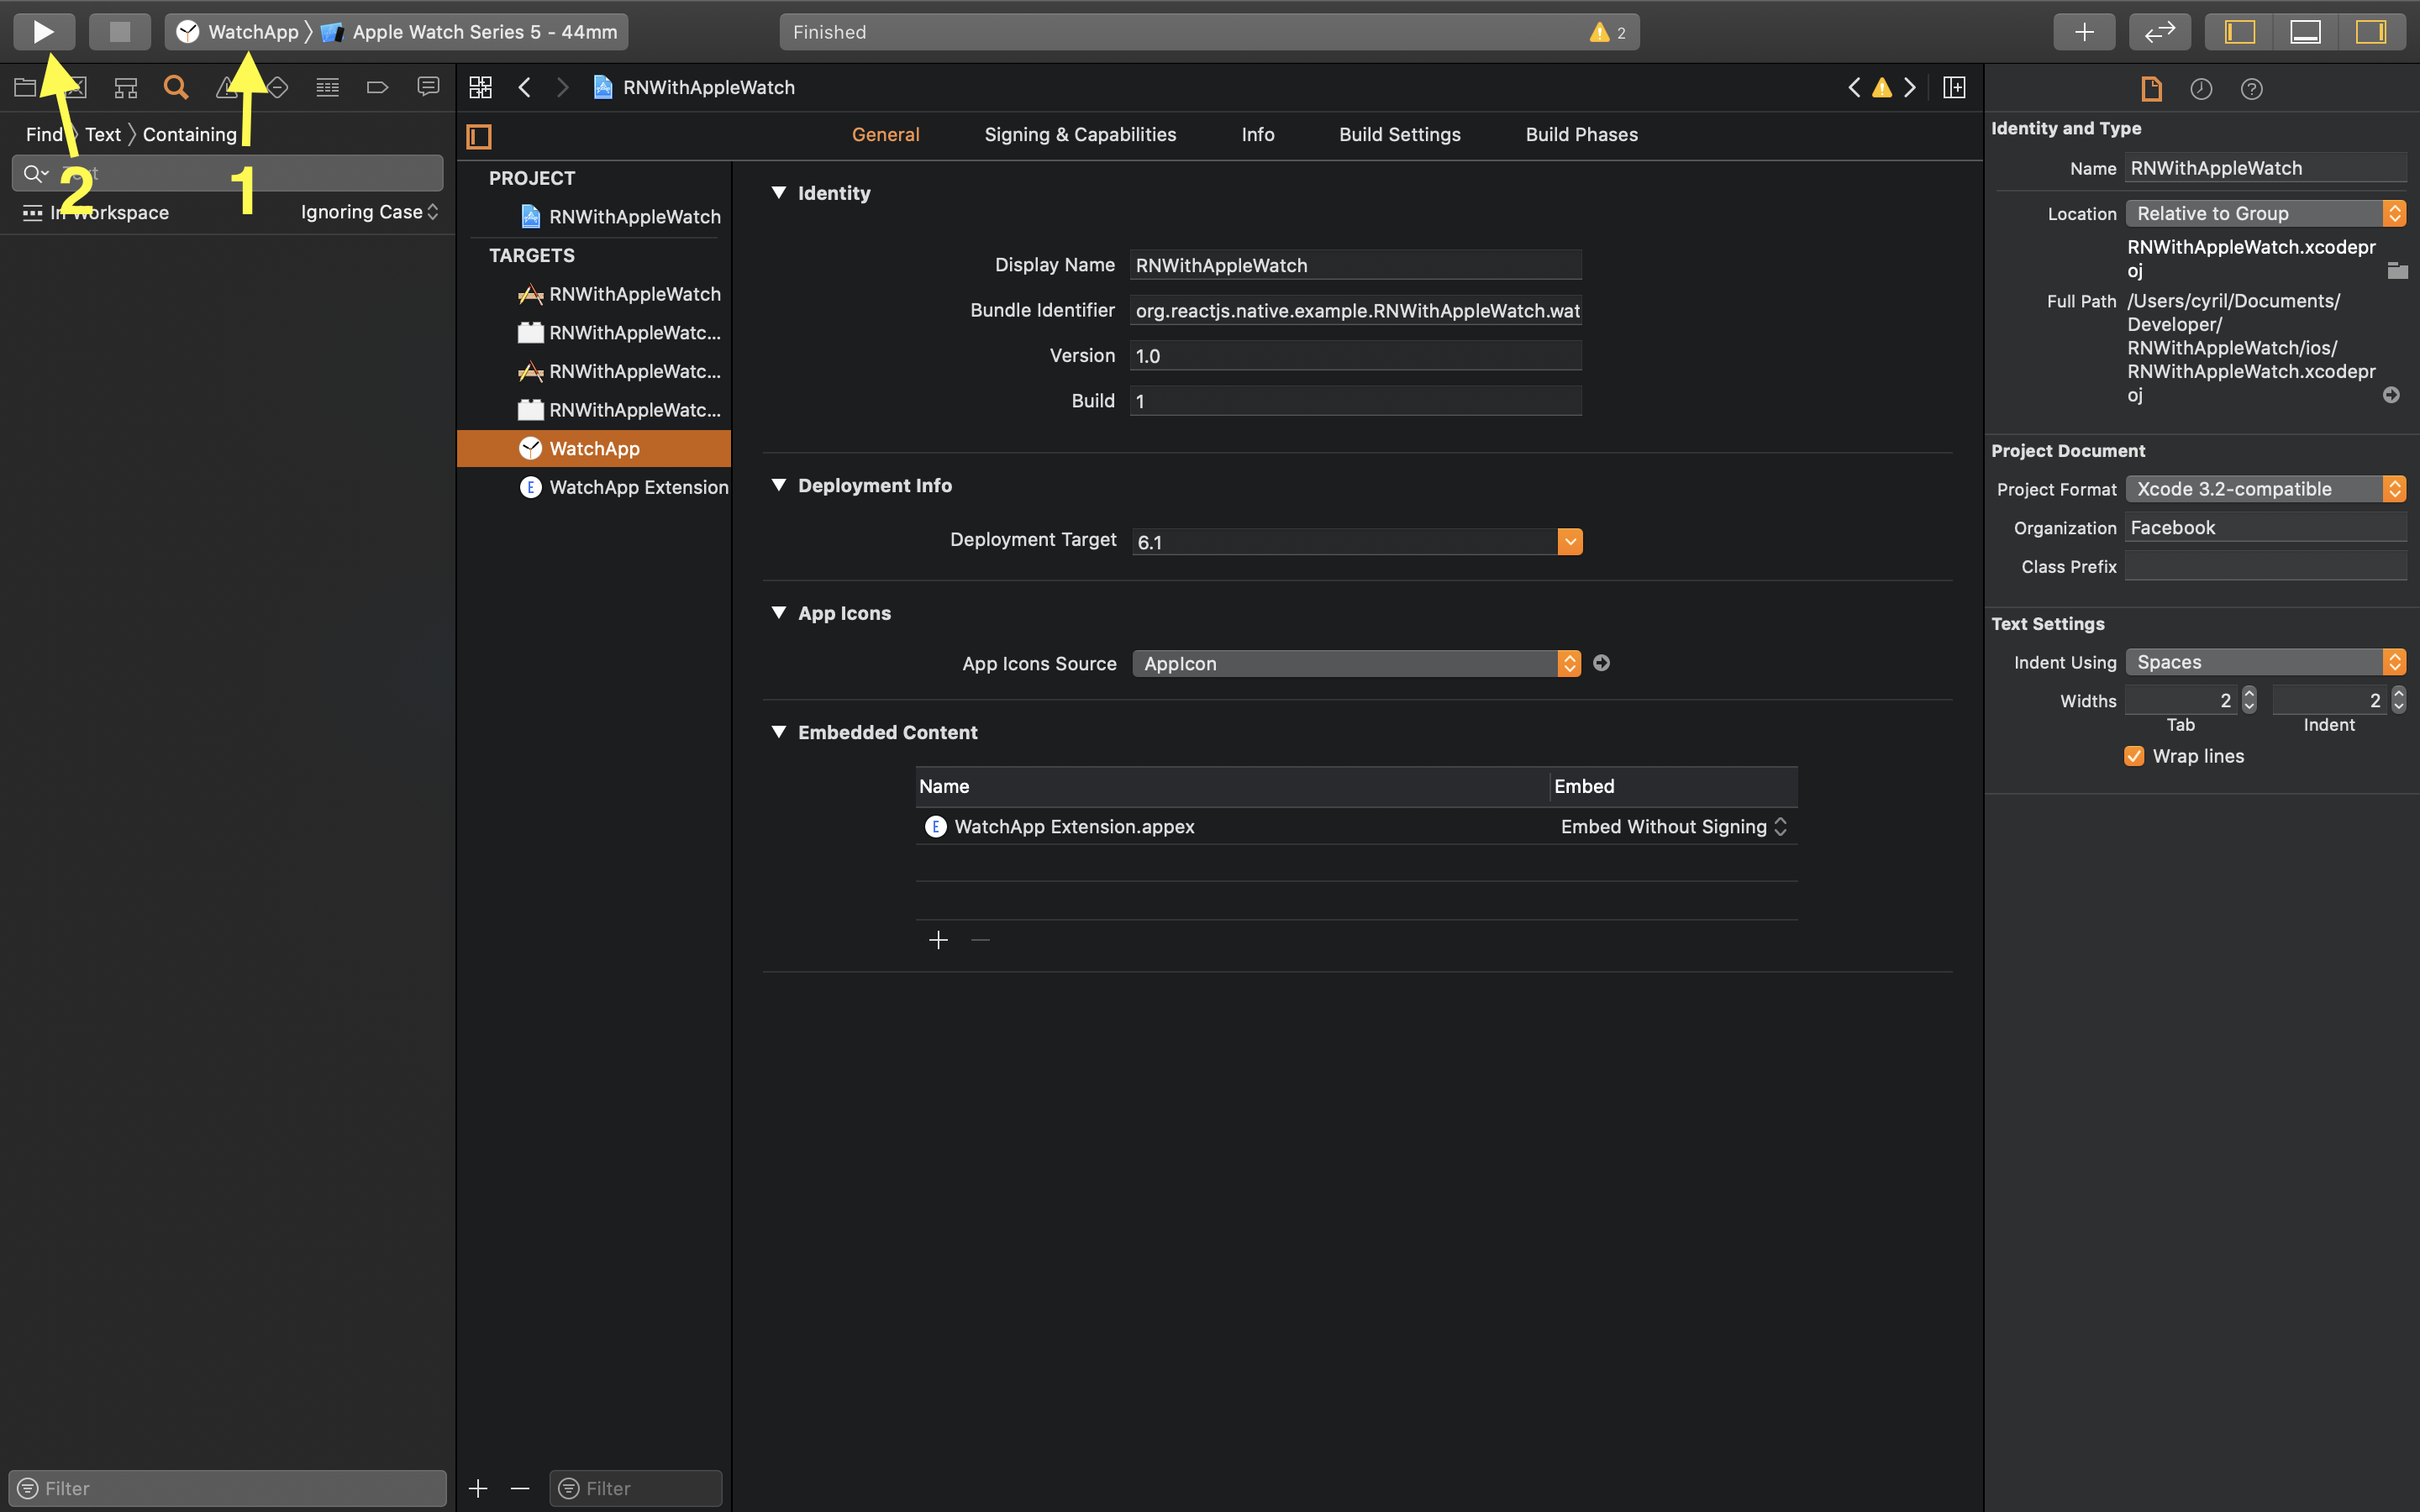
When you go back to your project file, you should now see two new folders ++code>WatchApp++/code> and ++code>WatchApp Extension++/code>.
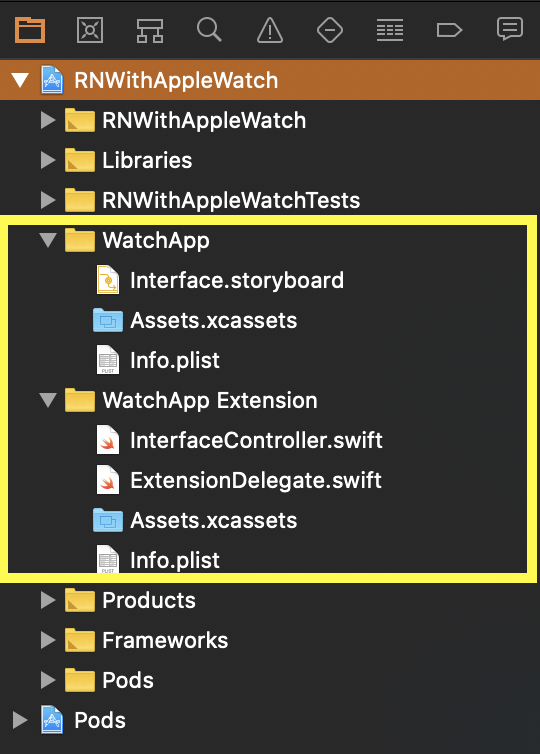
Both folders are essentials to build a watch App:
Only the ++code>WatchApp++/code> target will be installed on the watch. The ++code>WatchApp Extension++/code> will run on the device and the data processed will be sent back to the Watch App.
At this step, you can run the generated Watch App on a Watch App simulator. To do so :
You should see a watch simulator appearing on which an empty application is running :
WatchOS apps are based on the ++code>Model-View-Controller++/code> (MVC) pattern. To add some graphical elements we will modify the ++code>interface.storyboard++/code> file (the View) inside the ++code>WatchApp++/code> folder. To add a new object, click on the library button at the top right corner of the Xcode window.

Tap ++code>label++/code> in the search bar to find the label object and drag and drop it in the middle of the watch two times. You should get :

By default, the labels will be placed in the vertical direction. If you click on a label, you can modify its style and its content in the attribute inspector in the left pan of Xcode.

Now we have to add some logic to handle the receipt of a message from the iOS application.
To do so, open the file ++code>interfaceController.swift++/code> in the ++code>WatchApp Extension++/code> folder.
Change the content of this file with the following code :
++pre>++code class="has-line-data" data-line-start="137" data-line-end="166">import Foundation
import WatchKit
import WatchConnectivity
class InterfaceController: WKInterfaceController, WCSessionDelegate {
@IBOutlet weak var textToDisplay: WKInterfaceLabel!
var session: WCSession?
// Initializes the interface controller with the specified context data
override func awake(withContext context: Any?) {
super.awake(withContext: context)
if WCSession.isSupported() {
self.session = WCSession.default
self.session?.delegate = self
self.session?.activate()
}
}
// Called when the activation of a session finishes
func session(_ session: WCSession, activationDidCompleteWith activationState: WCSessionActivationState, error: Error?) {}
// Called when an immediate message arrives
func session(_ session: WCSession, didReceiveMessage message: [String : Any], replyHandler: @escaping ([String : Any]) -> Void) {
print("watch received message", message);
let text = message["message"] as? String
self.textToDisplay.setText(text)
}
}
++/code>++/pre>
Our controller implements two interfaces :
The ++code>session++/code> variable initiates the communication between the Watch App and the iOS App.
The ++code>textToDisplay++/code> variable will be linked to our second label to display the message received from the iOS app. However, it is not connected yet. You can know this by looking at the circle on the left which is empty.

To correct this, open the ++code>interface.storyboard++/code> file inside the ++code>WatchApp++/code> folder. Above the representation of the watch, the little circle is a direct link to your controller. If you ctrl + click on it, you will be able to drag an arrow. Point this arrow to the second label and chose the outlet ++code>textToDisplay++/code>.

Now your storyboard and your controller can interact.
That's all for the native part! In the next part, we will move on to the react-native part of the tutorial.
As our application is developed in react-native, we need to use a bridge to have access to the WatchConnectivity API. Fortunately, react-native-watch-connectivity already implements everything we need. To install this library, run :
++pre>++code class="has-line-data" data-line-start="190" data-line-end="193">yarn add react-native-watch-connectivity
react-native link
++/code>++/pre>
In your ++code>App.js++/code> file replace the code of ++code>sendMessageToAppleWatch++/code> with the following one :
++pre>++code class="has-line-data" data-line-start="197" data-line-end="205">const sendMessageToAppleWatch = () => {
Watch.sendMessage({message}, error => {
if (error) {
Alert.alert(`the message "${message}" can't be sent`);
}
});
};
++/code>++/pre>
Restart the application. You can now send a message from the iPhone simulator to the apple watch simulator!

Congratulations! You have run your first Apple Watch Application. If you want to go deeper on this subject, react-native-watch-connectivity gives you everything you need to handle the reachability of the watch, the paring status, file transfer and more. You will quickly be able to add more value to your react-native application!


Le BAM Innovation Lab, pour rester à la pointe des dernières innovations tech et produit !


